

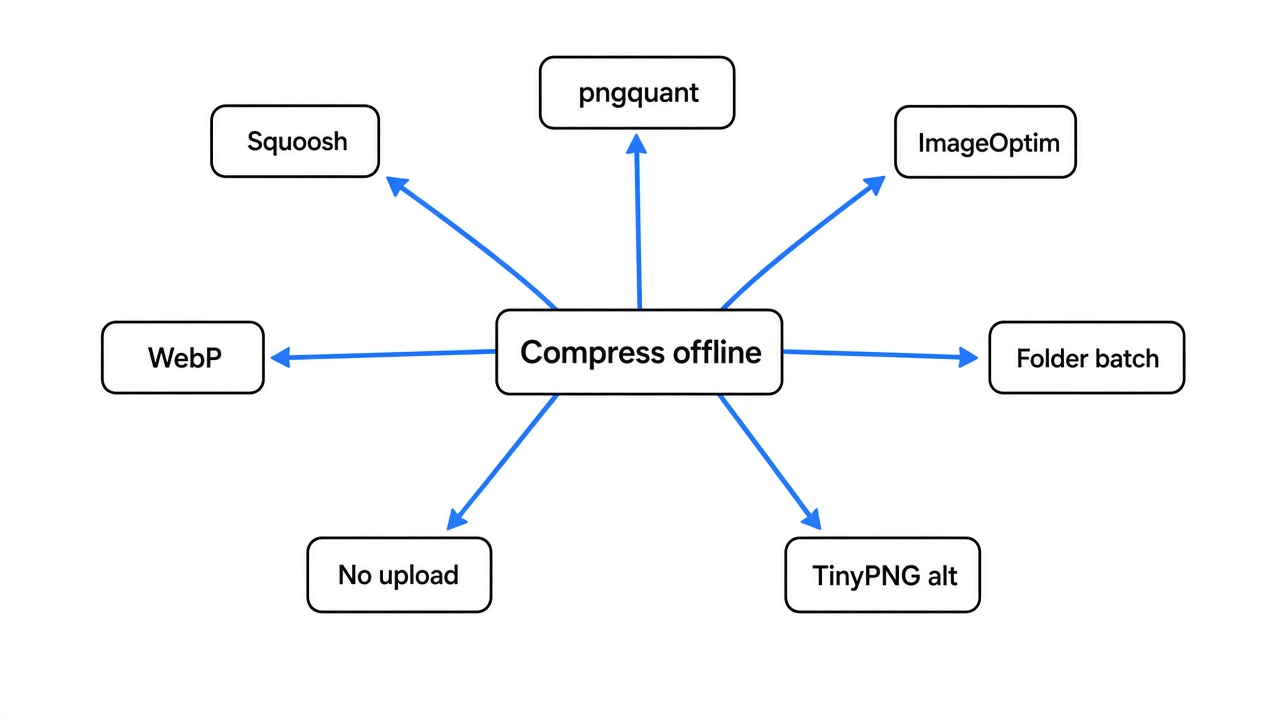
Short answer: compress images without uploading by using a tool that runs on your own computer. Squoosh does it inside your browser; PicLite, ImageOptim and Caesium are free desktop apps; pngquant, jpegoptim and cwebp compress whole folders of images from the terminal. Then match the method to the picture: WebP for photos, pngquant for screenshots.
You need a smaller image. Maybe a website rejects anything over 2 MB, or a page loads slowly, or your email bounces. So you search, land on TinyPNG or a site like it, and drag your file in.
Related privacy tooling on this site: ExifCleaner vs ExifTool for stripping metadata without a web upload, and Magic Wormhole vs LocalSend for moving a file without the cloud.
That works. But the file has to travel to someone else’s server first, and the free web version stops at 20 images of 5 MB each. For a passport scan, a client mockup or a folder of 300 product photos, that is a bad deal.
Here is the good news. The same kind of compression runs fine on your own laptop, for free, in seconds. I tested the common methods on photos and a screenshot, and one thing stood out: the picture decides the tool, not the other way round.
What Does Compressing an Image Actually Do?
It throws away data your eyes will not miss, or packs the same data tighter. Those are the two kinds of compression, and they behave very differently.
So start with the base fact. A digital picture is a grid of pixels (tiny colored squares), and the file stores a color for every one. A phone photo has millions of them, which is why it is big.
Lossless compression (shrinking without changing a single pixel) finds patterns and writes them more briefly. Think of writing “50 blue squares” instead of “blue, blue, blue…” fifty times. You get the exact picture back, but the savings are often small.
Lossy compression (shrinking by changing pixels slightly) goes further. It drops fine detail and blends near-identical colors, which you rarely notice at normal size. That is where the big savings come from, and it is what TinyPNG does too.
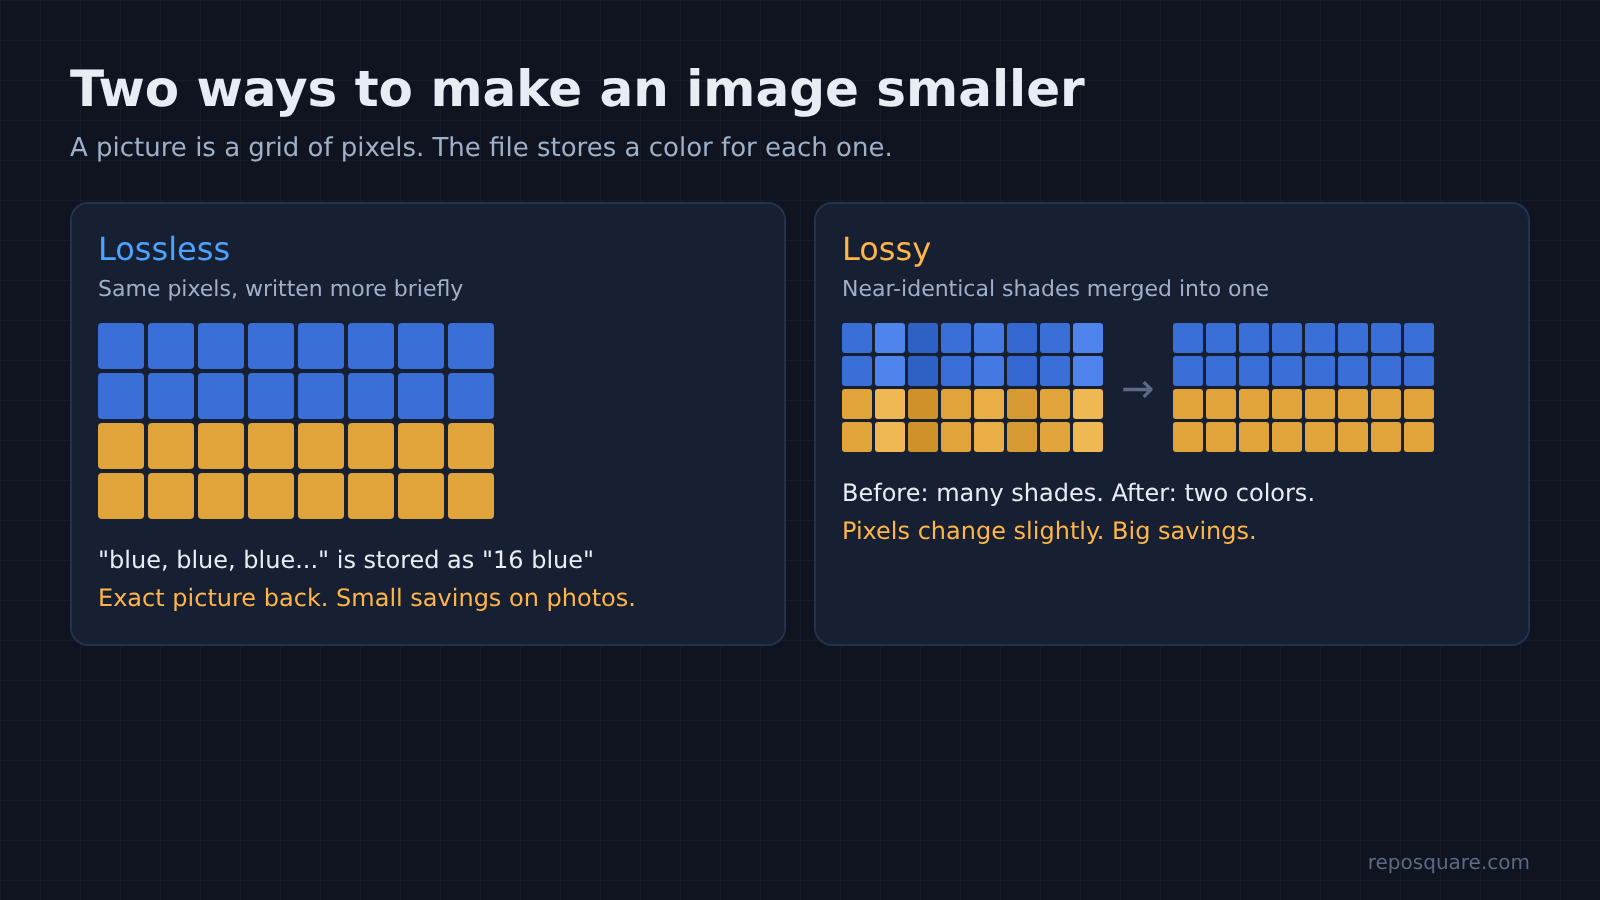
So every tool in this post is really one of these two moves, done with a different recipe. The recipe is the part that has to fit your picture.
Can I Compress Images Offline for Free?
Yes, and you have more choices than you think. Some run in a browser tab, some install like any app, and some are one line in the terminal.
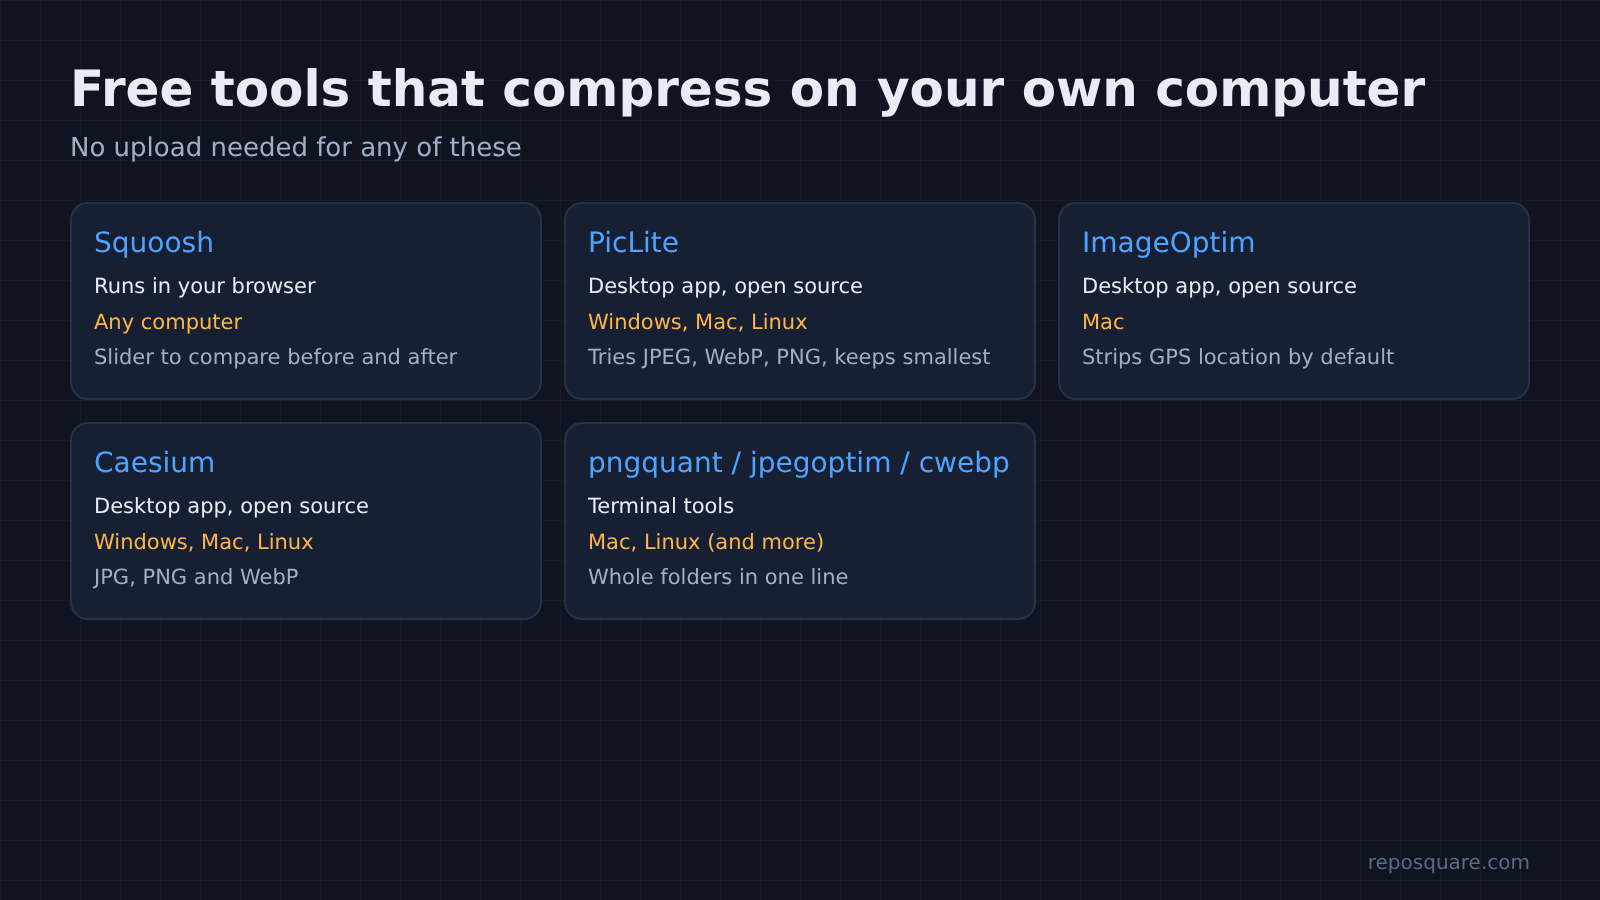
Here are the ones worth knowing, all free:
- Squoosh: a Google web app. It does not send your image to a server; all compression runs inside your browser.
- PicLite: an open source desktop app for Windows, Mac and Linux (GPL license). For each image it tries JPEG, WebP and PNG and keeps the smallest result.
- ImageOptim: a free, open source Mac app. It bundles pngquant and MozJPEG (a better JPEG encoder), and it strips GPS location from photos by default.
- Caesium: open source, for Windows, Mac and Linux, handles JPG, PNG and WebP.
- pngquant, jpegoptim and cwebp: small terminal tools. Best for big folders or scripts.
But one honest note on Squoosh. The image stays on your device, but the site does collect basic analytics, including the before and after file sizes. If that bothers you, use a desktop app or the terminal tools instead.
Which one should you pick? That depends less on the app and more on what is in the picture, so here is the test.
Which Compression Method Makes Images Smallest?
WebP wins for photos, pngquant wins for screenshots, and lossless barely helps photos at all. I measured it so you do not have to guess.
So the question was simple: for each kind of picture, which method gives the smallest file that still looks right?
Here is what I did. I took six classic test photos (a standard set used to judge image quality), the same six saved as high-quality JPEGs like a phone makes, and one app screenshot. Then I ran each method and measured the file size and a quality score.
The quality score is SSIM (a number from 0 to 1 for how alike two images look; 1 means identical). The closer to 1, the closer to the original.
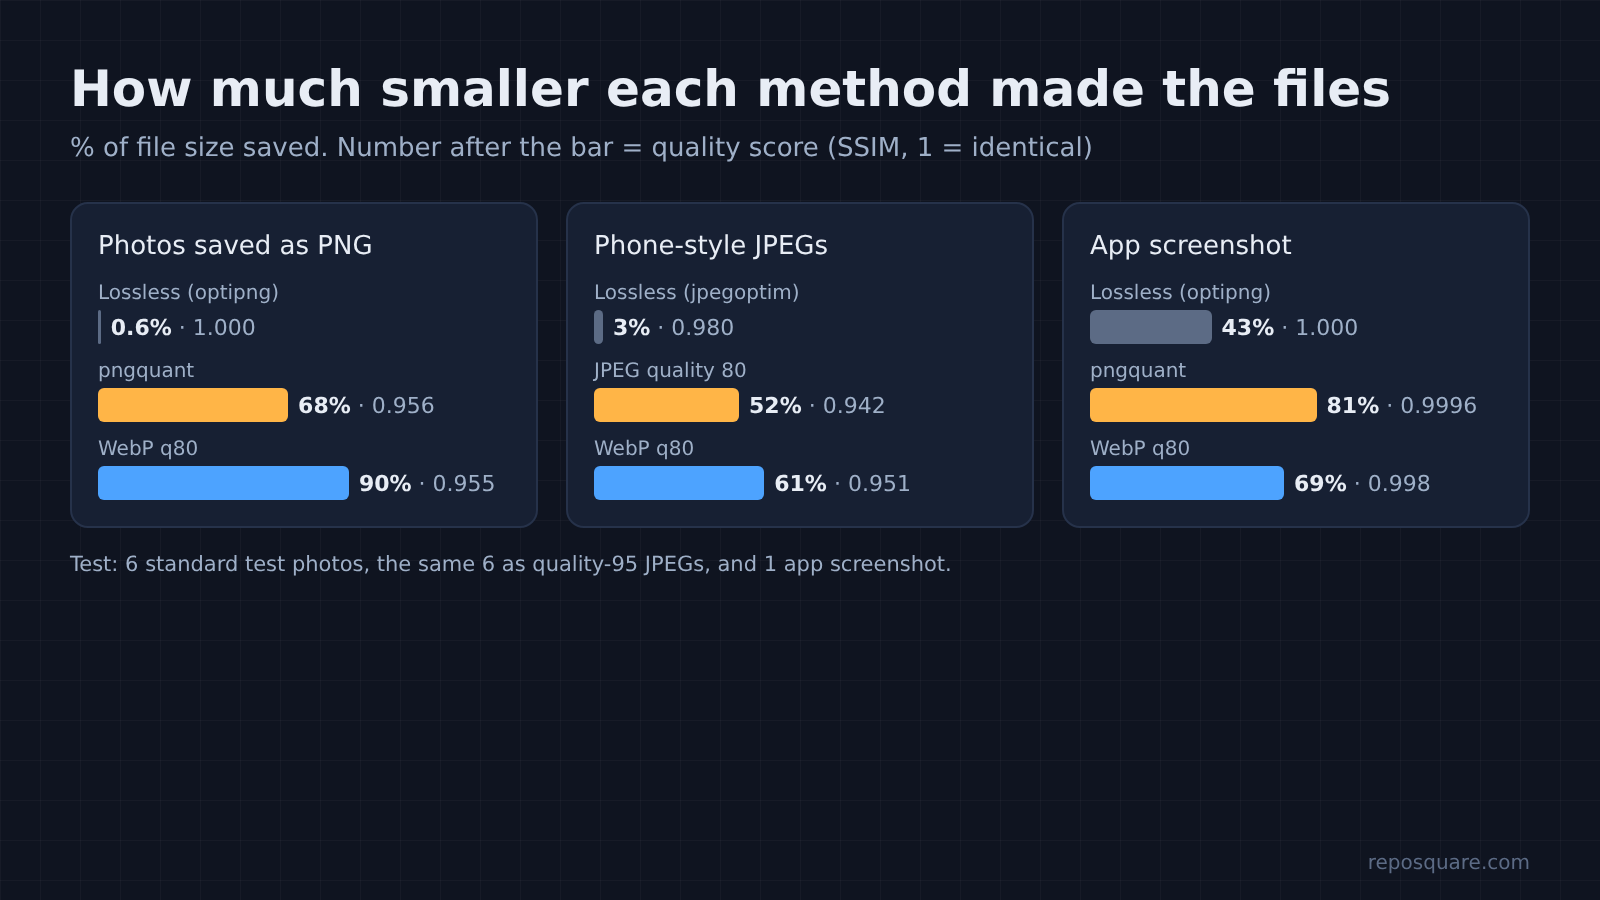
Here is what came back:
- Photos saved as PNG: lossless optimizing saved under 1%. pngquant saved 68%. WebP saved 90% at the same average quality.
- Phone-style JPEGs: lossless optimizing saved 3%. Re-saving at quality 80 saved 52%. Converting to WebP saved 61%.
- The screenshot: lossless saved 43%. pngquant saved 81% and scored 0.9996, so it looks identical. WebP saved 69%.
And running every method on all 13 files took about five seconds in total on a normal cloud server. No upload, no queue.
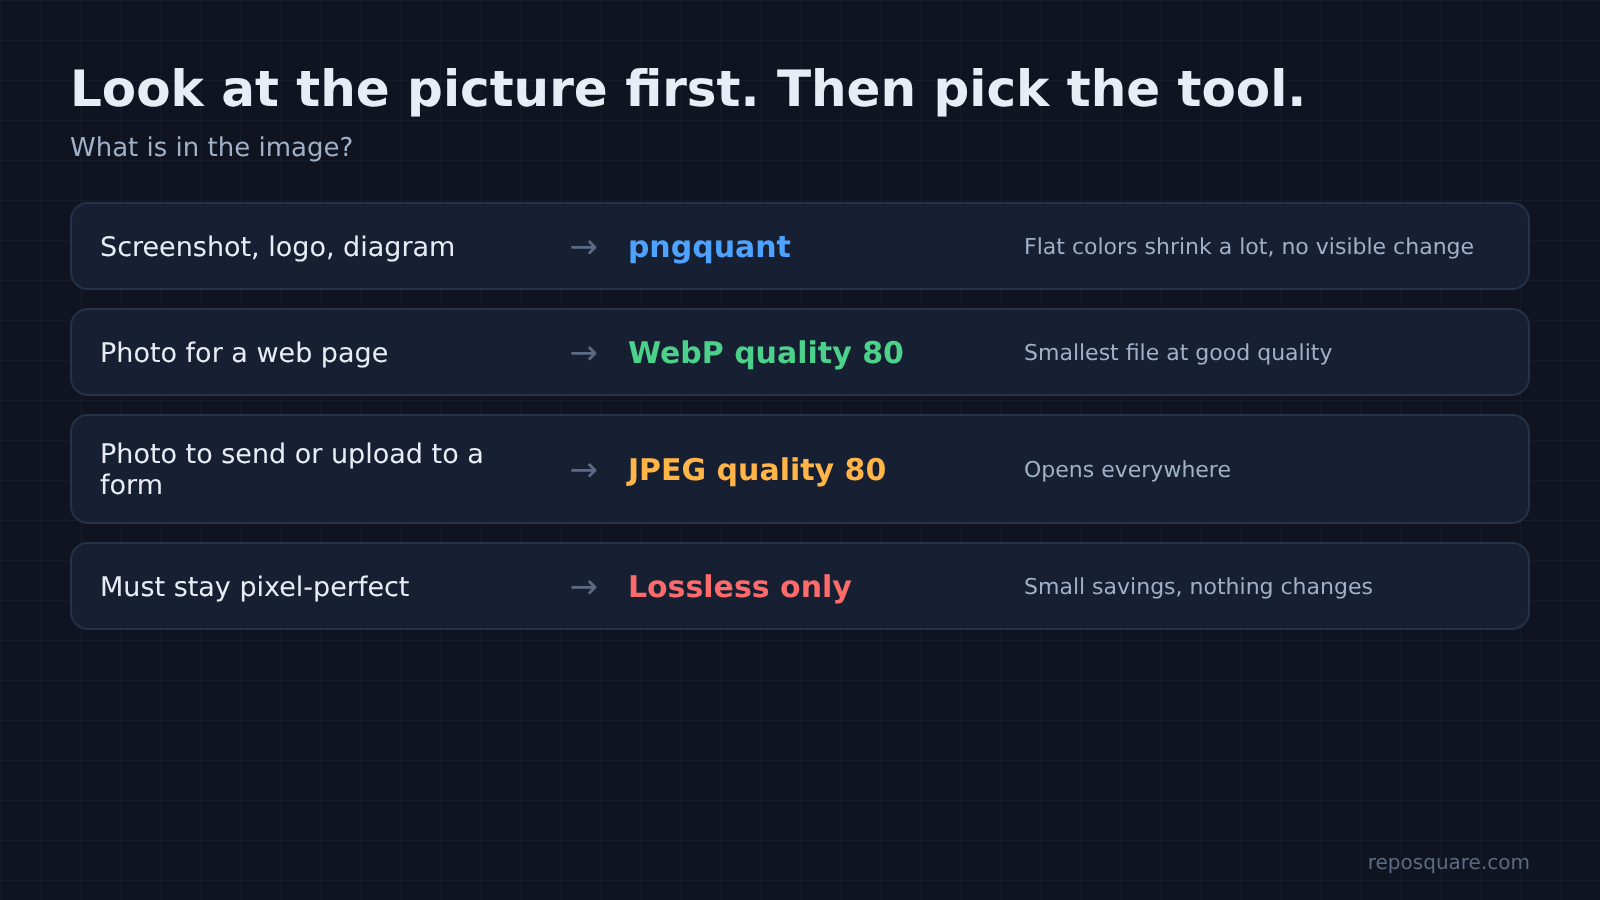
What does that mean for you? A photo stored as PNG is the worst case, and switching it to WebP or JPEG does more than any optimizer. A screenshot is the opposite: it is full of flat colors, so pngquant shrinks it hugely without visible change.
Why Does pngquant Make Some Photos Look Worse?
Because it limits the whole picture to 256 colors, and smooth gradients need more. That is the catch hiding inside the average numbers.
pngquant works by building a palette (a short list of colors the image is allowed to use) and redrawing every pixel with the nearest color from that list. A screenshot is mostly big flat areas, so squeezing it to 256 colors barely shows. The parrot photo in my set has over 72,000 different colors.
On that photo, pngquant scored 0.904, the lowest result of the whole test. Zoom in and you can see why: the smooth background turns into bands and speckles. WebP kept it at 0.94 while making the file about six times smaller than pngquant’s.
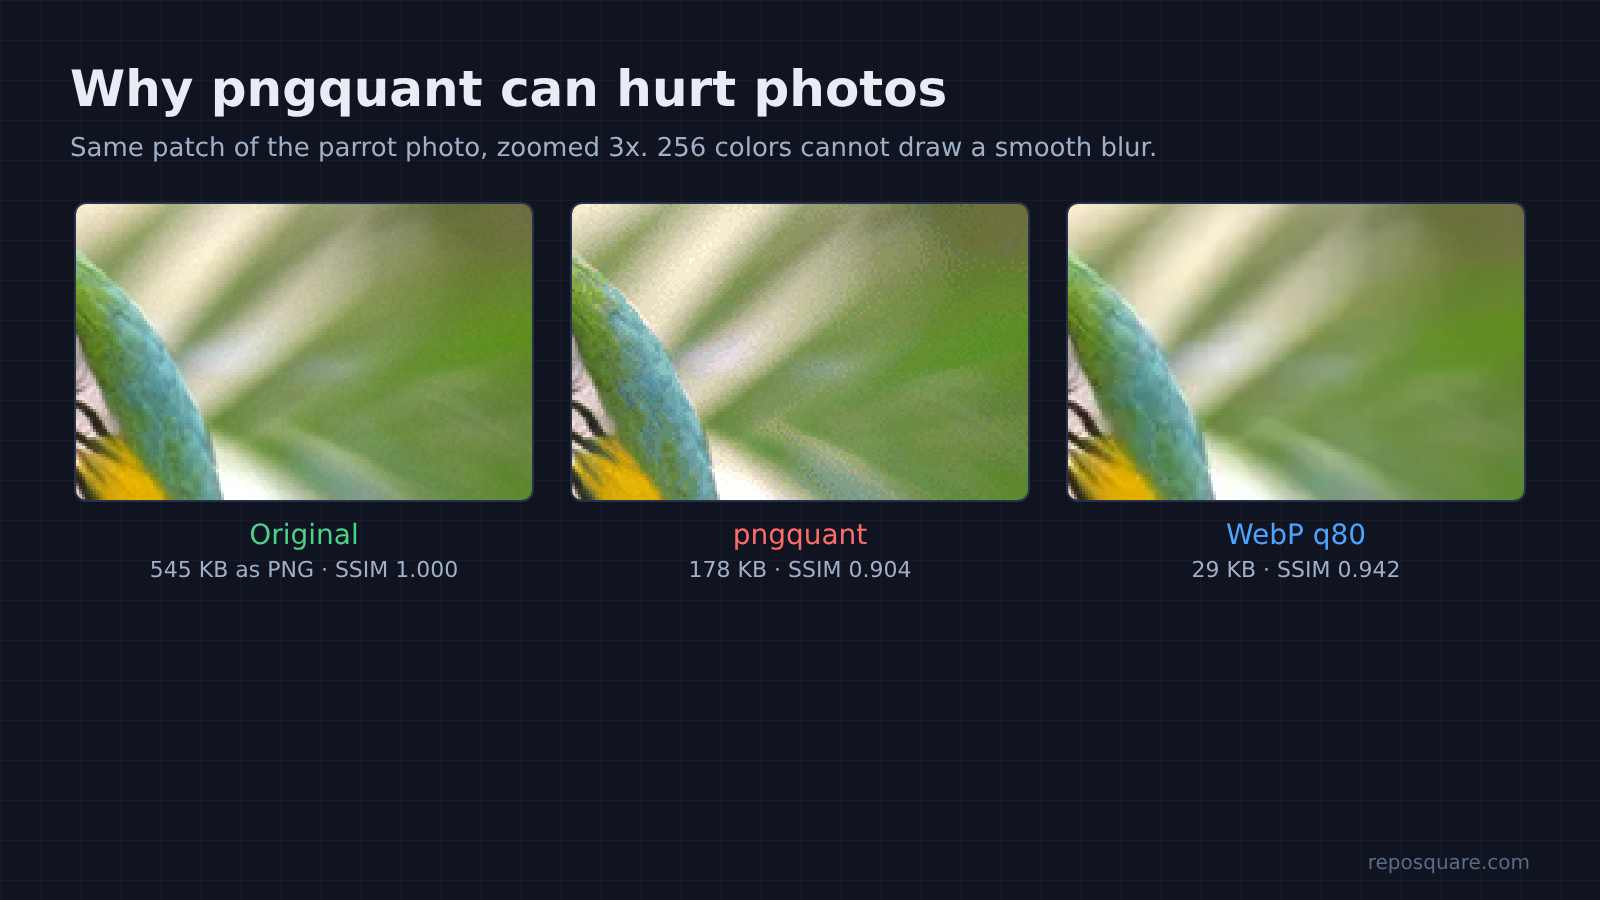
So the average hid the problem. If you only compress screenshots, logos and diagrams, pngquant is the best tool here. If you compress photos with skies, skin or blur, send them to WebP or JPEG instead.
How Do I Compress a Whole Folder of Images at Once?
Use the terminal tools, which take a whole folder in one line. This is where local tools beat any upload site, because there is no 20-file limit and no waiting. For another local file-size problem on disk, see HatchZip vs Unzip.
So start by installing them. On a Mac, use Homebrew (the usual Mac package installer). On Linux they are in your normal package manager.
# Mac
brew install pngquant jpegoptim webp

# Ubuntu / Debian
sudo apt install pngquant jpegoptim webpThen run the one that fits your pictures. Each command keeps your originals:
# Screenshots and graphics: writes name-small.png next to each file
pngquant --quality=65-80 --ext -small.png *.png

# Photos as JPEG: re-saves at quality 80 into a "small" folder
mkdir small
jpegoptim --max=80 --strip-all --dest=small *.jpg

# Photos as WebP: writes name.webp next to each JPEG
for f in *.jpg; do cwebp -q 80 "$f" -o "${f%.*}.webp"; done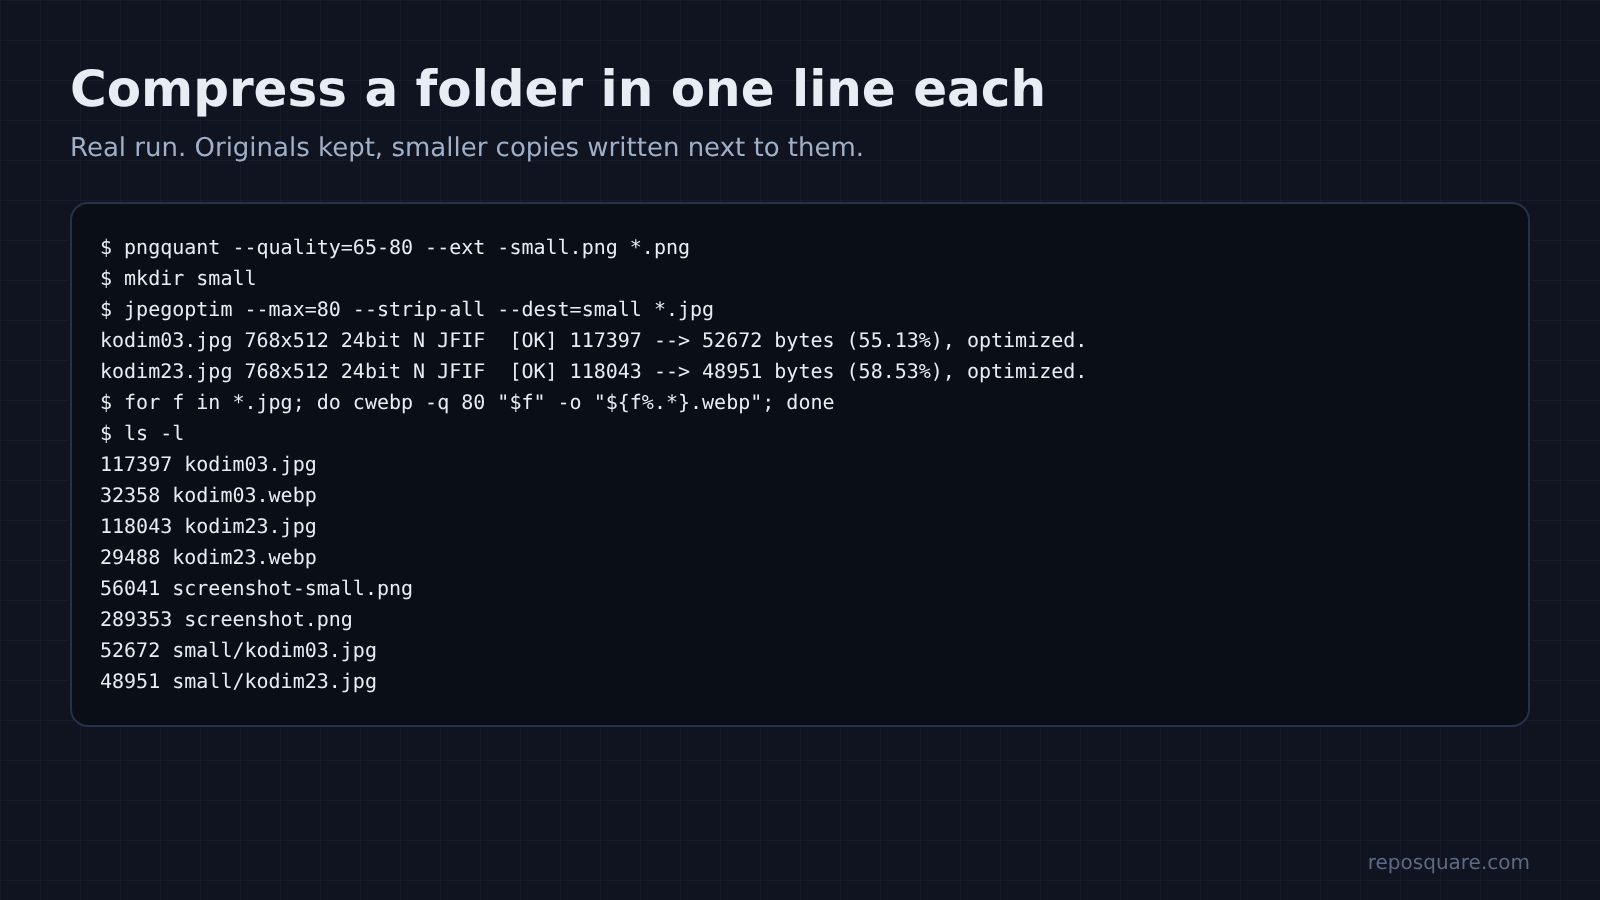
That --strip-all flag removes metadata (hidden details stored inside the file, like camera model and GPS location). That shrinks the file a little more and stops you from sharing where a photo was taken. If you want to clean location data on its own, there is a full guide to removing EXIF data.
And on Windows? The easiest path there is a desktop app. PicLite and Caesium both have Windows installers and need no terminal.
Is WebP Safe to Use Instead of JPEG?
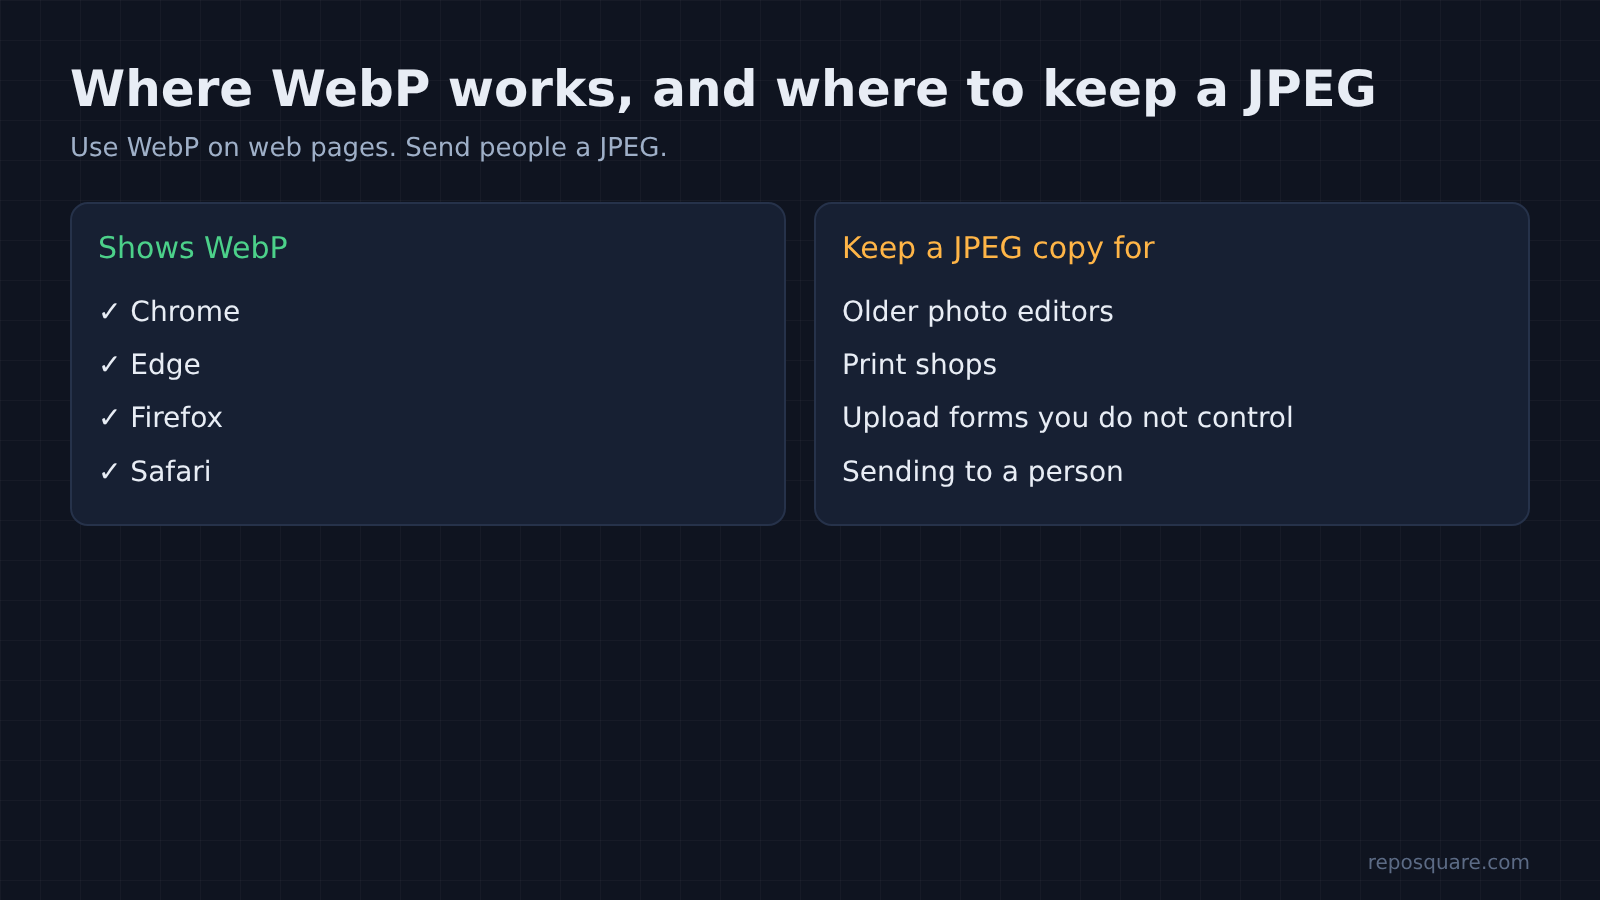
For websites, yes: every major browser shows WebP. Chrome, Edge, Firefox and Safari all support it, and it counts as a widely available web feature. PDF size work is a cousin problem: pdfcraft vs qpdf.
The catch is outside the browser. Some older photo editors, print shops and upload forms still only accept JPEG or PNG. So use WebP for anything that ends up on a web page, and keep a JPEG copy for anything you send to a person or a form you do not control.
What Should I Use Instead of TinyPNG?
Pick by how many images you have and what is in them. Here is the short version.
- One or two images, any computer: Squoosh in your browser. A slider shows the original and the result side by side, so you can push quality down until it starts to look bad.
- Regular batches, no terminal: PicLite on any system, ImageOptim on a Mac, Caesium on Windows.
- Hundreds of files or a build script: pngquant for graphics, cwebp or jpegoptim for photos.
Still, there is a fair case for TinyPNG. It is fast, it needs no install, and its results are good. If your images are not private and you only need a few, it is fine.
For everything else, the work runs just as well on your own machine. Look at the picture first. Then pick the tool.
Common questions about compressing images without uploading
Can I compress images without losing quality?
Yes, with lossless tools, but photos shrank by under 5% in my test. The screenshot did better at 43%. For bigger savings use lossy compression, then compare before and after yourself.
Is Squoosh safe for private images?
Squoosh compresses inside your browser and does not send your image to a server. It does collect basic analytics, including file sizes, so use a desktop app or a terminal tool if you want to avoid that.
Why is my PNG photo so big?
PNG keeps every pixel’s exact color, which suits graphics but bloats photos. In my test, WebP made the same photos 85 to 95% smaller, and even a high-quality JPEG cut them by about 70 to 80%.
Does compressing remove GPS location from photos?
Only if the tool strips metadata. ImageOptim does it by default, and jpegoptim does it with the --strip-all flag. Check the setting before you share.