
I needed one picture of a gauge in a doc, and the picture I already knew how to make was boxes with arrows. A box does not move, so the reader still has to imagine the motion. The anatomy skill (a folder of instructions a coding agent reads before it draws) builds a small machine instead, and the motion of that machine is the idea. It is worth it when someone has to watch a needle, a lock, or a carriage. It is not worth it when you needed a flowchart before lunch.
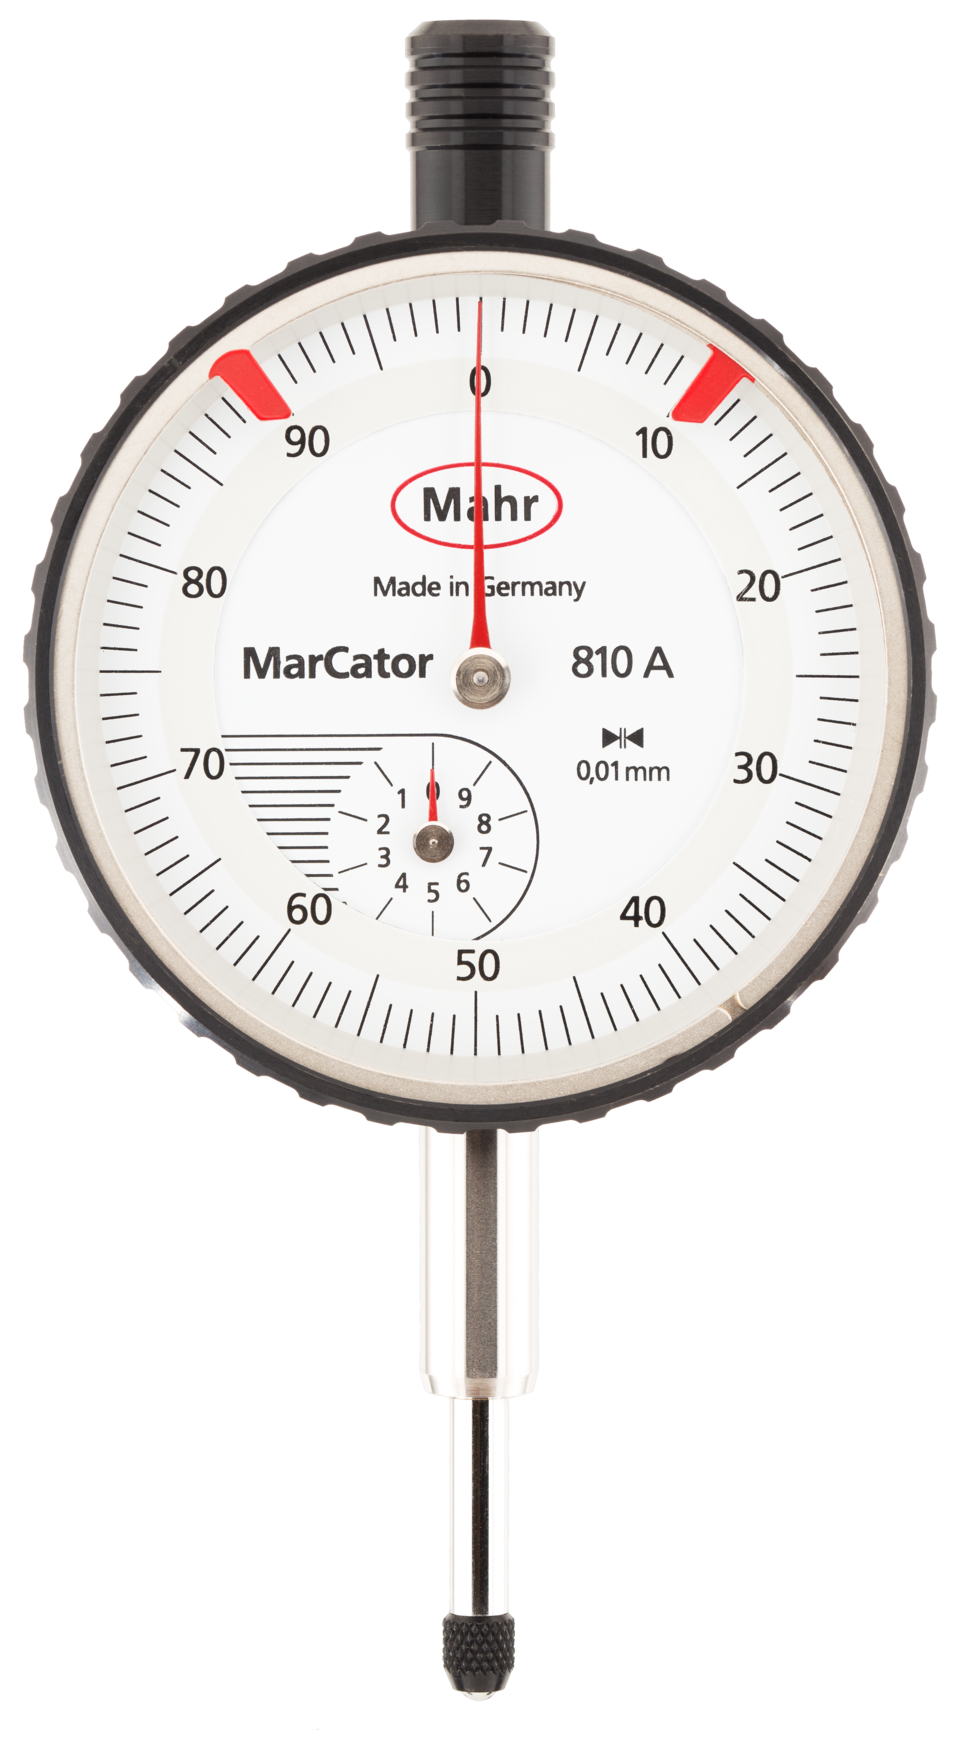
A coding agent is the program that edits files and runs commands for you, not a chat box that only talks about code. The skill does not replace that program. It tells the program how to draw, so the first picture is a machine a person could recognise on a bench.
is the anatomy skill worth it
Yes, if the idea is a mechanism and you can spend about an hour on a small figure. No, if the idea is a list of steps.
The reason is simple. People already know how a lock, a gauge, and a drawer work, because they have used those things. They do not already know how your cache, your blur, or your pool of connections works. If the machine moves the way the idea moves, the reader borrows the thing they already know. A labelled box does not lend them that.
I would install it the next time a doc has to show something change. I would leave it alone for a six-line flow in a README. That flow already has a better tool, and I link it below.
how do i explain a technical idea with an interactive diagram
Say the idea and the real numbers. Do not describe the boxes.
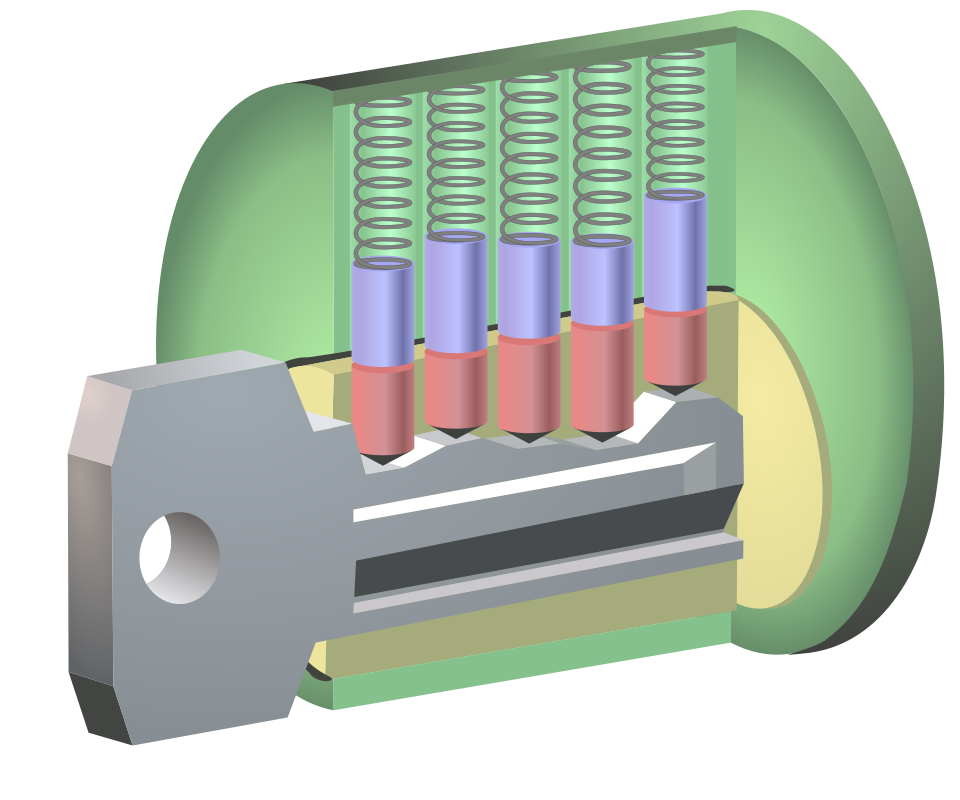
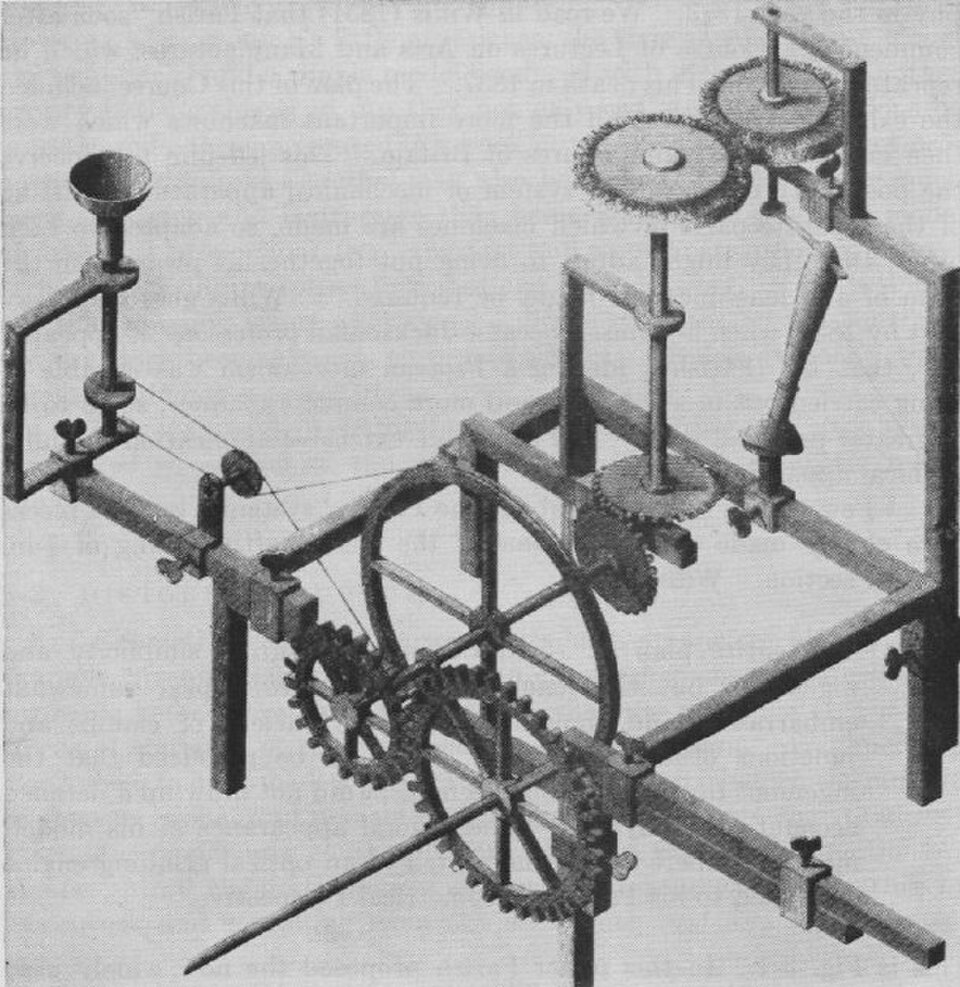
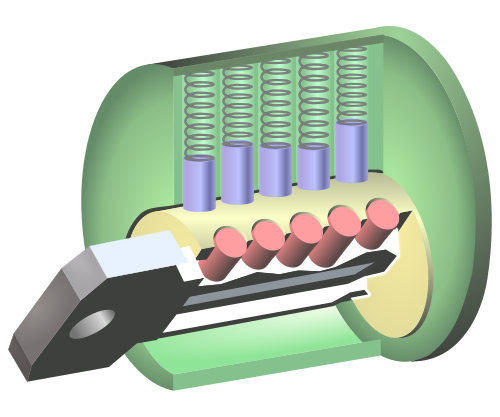
A picture teaches only if the moving part and the idea are the same event. Take a cache that skips work when nothing changed. Before the name of the lock, the prerequisite is just this: a lock turns only when its inner pieces line up, and a cache should skip the work only when the key matches. The matching object is a pin-tumbler lock (a lock that turns only when every pin lines up). When every pin matches, the plug turns, and nothing is redrawn. The turn is the cache hit. You do not need a caption that says hit. The reader already knows a lock that does not turn.
The same mapping works for other ideas, once you have a motion you can say in one sentence. One shared drawing surface for many canvases becomes a plotter with one head that visits 16 wells. Seven buffers of different sizes become a chest of seven drawers, each as deep as its size. A blur that can be split into two cheaper passes becomes a bed of nails beside two combs. A spring that presses and leans becomes a test rig with a probe and a dial. If you cannot name the motion in one sentence, you do not have a figure yet. You have a slogan.
Two failures show up if you skip that sentence. The drawing is too abstract, a stack of slabs with labels. Or it is too flat, one big block and a few lines. Both fail the same way: nothing to recognise, nothing to watch. The fix is the same too. Build a machine a person could put on a bench, from parts that belong to the mechanism. Screws, rails, and a label plate are allowed. Random texture is not.
how to use the anatomy skill
You need Node (the program that runs JavaScript on your computer) at version 20.10 or newer. You also need the coding agent you already use. The skill itself does not ask for an API key (a secret a paid model checks before it will answer).
For Claude Code, from any folder:
npx skills add wheresryan22/anatomy -g -a claude-codeThen, inside Claude Code:
/anatomy explain how a token bucket rate limiter works, interactiveOpenCode takes the same /anatomy line after you install with -a opencode. In Codex the slash becomes a dollar sign, $anatomy, installed with -a codex. Antigravity is the fourth install path, -a antigravity. If you only want the skill inside one project, drop the -g and run the command in that project.
Say three things in the request, or the figure gets vague.
- Name the idea, or name the object. “Explain a token bucket” is better than “draw some boxes and a bucket”. If you already know you want a Bunsen burner, say the burner, and say what should move when the air collar opens.
- Give the real numbers. A pool of 10 connections, a wait queue when all 10 are busy, a time-to-live of 60 seconds. The readout, the motion, and the caption have to come from the same numbers. A pretty needle that shows a made-up value is a lie with shading.
- Say where it will live. One HTML file, a lone SVG file, or a React component, and whether the page is dark or light.
SVG (a picture made of shapes rather than pixels, so it stays sharp when you zoom) is the default. Add WebGL (a second layer that paints light, fire, or water the lines cannot draw) only for the part lines cannot fake. The metal stays SVG. The flame can be the extra layer.
The skill sizes the job before it draws, and it is supposed to tell you the size.
| Size | What it is | What to expect |
|---|---|---|
| Figure | One mechanism, about 40 to 80 parts, at most one WebGL layer | Often under an hour. Budget up to an hour for the checks. |
| Hero | A dense object, several WebGL layers or one 3D subject, about 80 to 150 parts | About 2 to 4 hours. It should say so, then build, unless you asked for something quick. |
| Epic | A whole vehicle, building, or plant, or 3D on more than one subject | 6 hours or more. It should not start. It should offer a shorter version that keeps the core, and wait until you choose the long one. |
Whatever the size, a page that opens in the browser is supposed to exist inside the first hour. The rest is depth, not a blank wait.
The cheap look has a cause. A normal diagram lets you see through edges. This kit does not. Each part is a solid, painted from the back to the front, so the near part hides the far part. The kit picks four shades from the way a face points, plus a lighter top. You do not hand-colour every face. Every line has to end on a face, another line, or a dot. A leader line floating in the air is a fault, not a label. A pipe cannot pass through a part, at rest or while the picture comes apart. That is why a first figure takes an hour. The hour is the checking, not the first sketch.
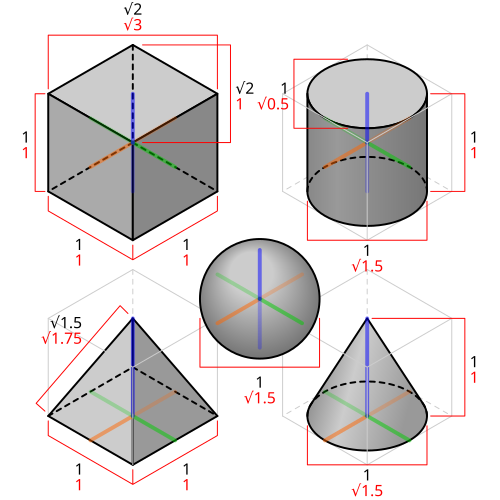
Isometric (a view where you see three sides at once and the edges stay parallel, so nothing shrinks toward a vanishing point) is the camera the kit uses by default. You do not have to say the word. If you ask for an explainer of how a system works, the skill still reaches for this camera. The point of the camera is not style. It lets a reader see the top, the front, and the side of a part in one glance, which is the glance a person uses on a real bench.
what changed when i built the dial example
The smallest shipped example is a dial gauge on a stand. No agent had to invent it. The build already sits in the repo, and running it is the check you can finish before lunch.
node examples/dial-indicator/build.mjsThat wrote dial-indicator.html next to the script. The same command with --light writes the light page.
| What I measured | Dark page | Light page |
|---|---|---|
| File size | 136,488 bytes | 136,489 bytes |
| Lines | 866 | 866 |
| SVG pictures in the file | 6 | 6 |
| Filled path shapes | 354 | 354 |
| Page title | Dial indicator | Dial indicator |
The card is fitted from a 600 by 380 drawing. The dial’s travel is 20 units per turn. Three blocks under the tip are 18, 14, and 10 units tall. Arrow Right and Arrow Up step one way. Arrow Left and Arrow Down step the other way. Home and End jump to the ends. That is the interaction in the page the build wrote.
So the build is real, and it is small. One command, no key, a file you can open. This is in contrast to asking for a new machine. A new machine is the slow part, because the agent has to invent the object, list at least 40 parts, and then draw them so nothing passes through anything else. The dial only proves the kit runs. It does not prove your next prompt will look like a finished instrument.
One caveat. The skill’s own note on a dense 3D hand of about 380 parts is about 20 frames a second on a loaded machine, and about 13 to 15 frames a second in a phone-sized view. A small 3D figure is described as 60 frames a second. Those speeds are the skill’s own figures. If you need parts to turn in real depth, budget the check the skill names for it, about 15 to 20 minutes for 30 parts, and treat the mode as beta.
anatomy skill vs mermaid
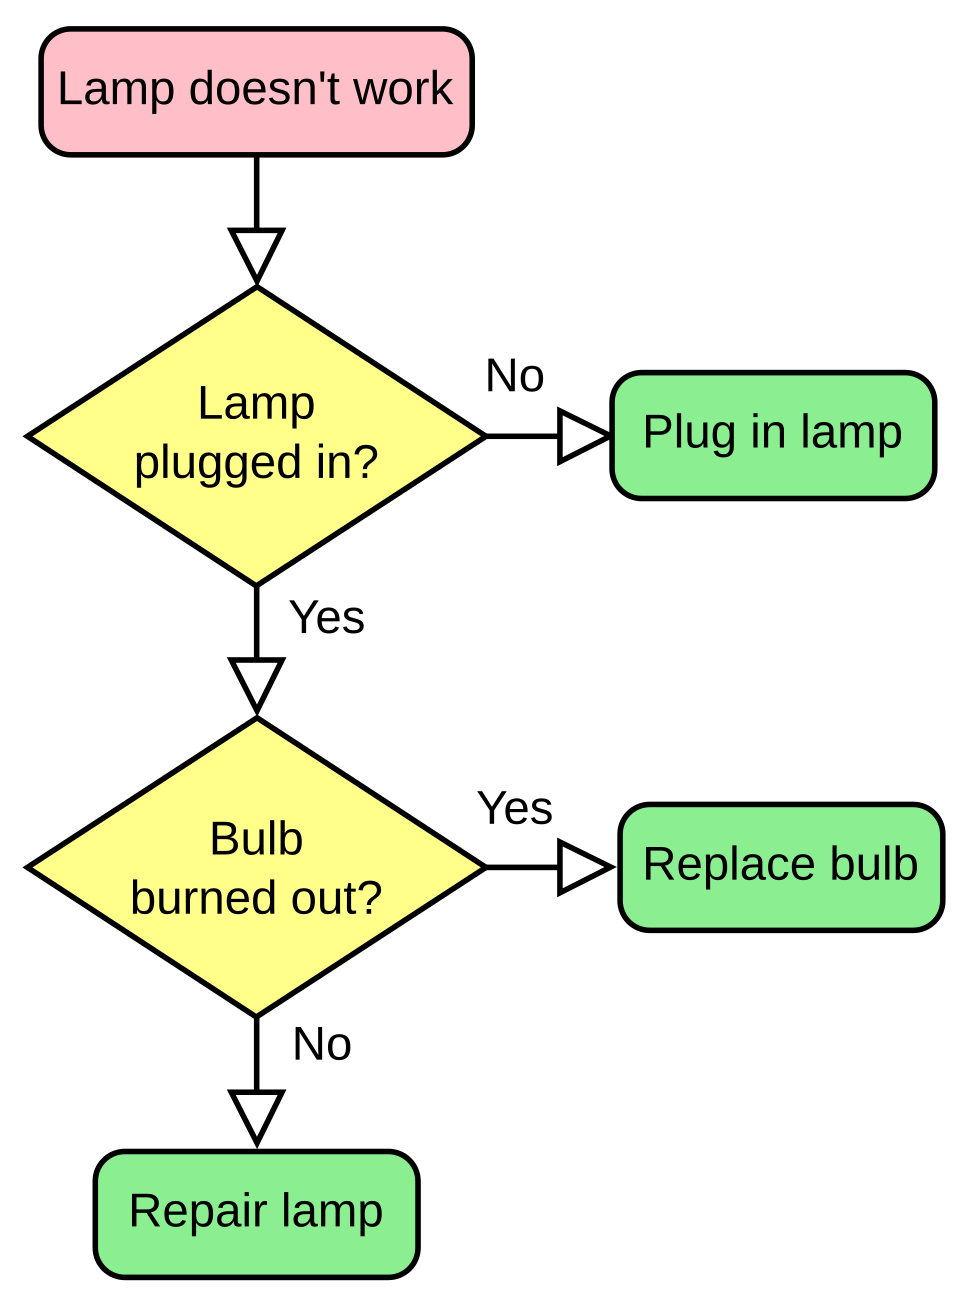
Mermaid (text that turns into boxes and arrows) is the right picture when the idea is a sequence. The anatomy skill is the right picture when the idea is a motion.
| Question | Mermaid | Anatomy skill |
|---|---|---|
| What you type | A short text flow | The idea, the numbers, and where the file should live |
| What you get | Boxes, diamonds, arrows | A machine whose moving part is the idea |
| Time | Minutes | Under an hour for a small figure, hours for a dense one |
| Zoom | A diagram | Shapes that stay sharp, with a check that lines end on something |
| When it fails | Labels collide, and the picture is still flat | You asked for a flow and got a watch |
| Who should pick it | A README, a decision, a pipeline | A doc, a landing page, or a post where the reader has to see the change |
If your last picture was a diamond sitting on its own label, stay with the chart and fix the chart. That comparison is diagram design vs mermaid. Anatomy does not repair a tangled flow. It refuses the flow.
when should i skip the anatomy skill
Skip it when any of these is true.
- The reader needs the order of steps, not a motion. Use a flow.
- You have ten minutes. A small figure is budgeted up to an hour, and a dense one is an afternoon.
- You want a whole plant or a vehicle on the first try. That is the size the skill tells you not to start.
- You need the parts to rotate in real depth. That mode is beta, and the heavy example slows down.
- You do not have Claude Code, OpenCode, Codex, or Antigravity, and you also do not want to build the shipped examples yourself. The examples need only Node. A new figure needs one of those agents, because the skill is instructions they read.
Use it when the sentence “the reader should watch this happen” is easy to finish. Watch the needle track the block. Watch the plug turn when the pins line up. Watch one head visit 16 wells. If you cannot finish that sentence, you do not have a job for this skill yet.
A skill folder is not the model. The model still writes the drawing. The folder only stops it from guessing the craft. If you want the wider picture of what sits around the model, the loop, the tools, and the files it reads, that is how Claude Code works. If you are choosing among skill folders rather than among pictures, Matt Pocock’s skills are a different job. And if the thing you needed was a test that clicks a page, not a figure of a machine, that fork is e2e vs Playwright.
does the anatomy skill need an api key
No. Installing the folder does not ask for a key, and building the dial example did not ask for one either.
You still pay for the agent if your agent is a paid seat. The skill does not add a second bill. It also does not draw by itself. Open the HTML only after something has written it. For the eight examples in the repo, that something can be Node. For a new idea, that something is the agent, following the folder.
Common questions about the anatomy skill
can i use the anatomy skill without claude code
Yes for the examples. Clone the repo and run node examples/dial-indicator/build.mjs. You get a standalone page. A new figure still needs Claude Code, OpenCode, Codex, or Antigravity, because those are the programs that read the instructions.
is an anatomy figure the same as mermaid
No. Mermaid is a flow. An anatomy figure is a machine. Use the flow for steps. Use the machine when the change itself is the lesson.
how long does an anatomy figure take
A small figure is meant to land inside an hour. A dense one is about 2 to 4 hours. A whole vehicle is 6 hours or more, and the instructions say to offer the shorter version first.
The source and the kit are in the anatomy repo. I would open the dial page before I asked for anything new. If the needle moving across three blocks is the kind of lesson you needed, the skill is worth the hour. If you wanted the lamp flowchart, it is not.